There isn’t a better recipe to debut this blog with than the cookie that still defines my holiday season.
Growing up, we spent the days between Christmas and New Years with my grandparents and cousins in small-town Virginia. These sugar cookies were a highlight of the trip. I still remember the giant holiday-themed tin that they were not-so-safely kept in on top of the dryer off my grandparents’ kitchen. I think it was 2 feet in diameter but I’m guessing it seemed that large because I was 6. I’ve written about these cookies before and the sweet smell that wafts out of the tin (or Ziplock bag) upon opening — it takes me right back to that laundry nook.
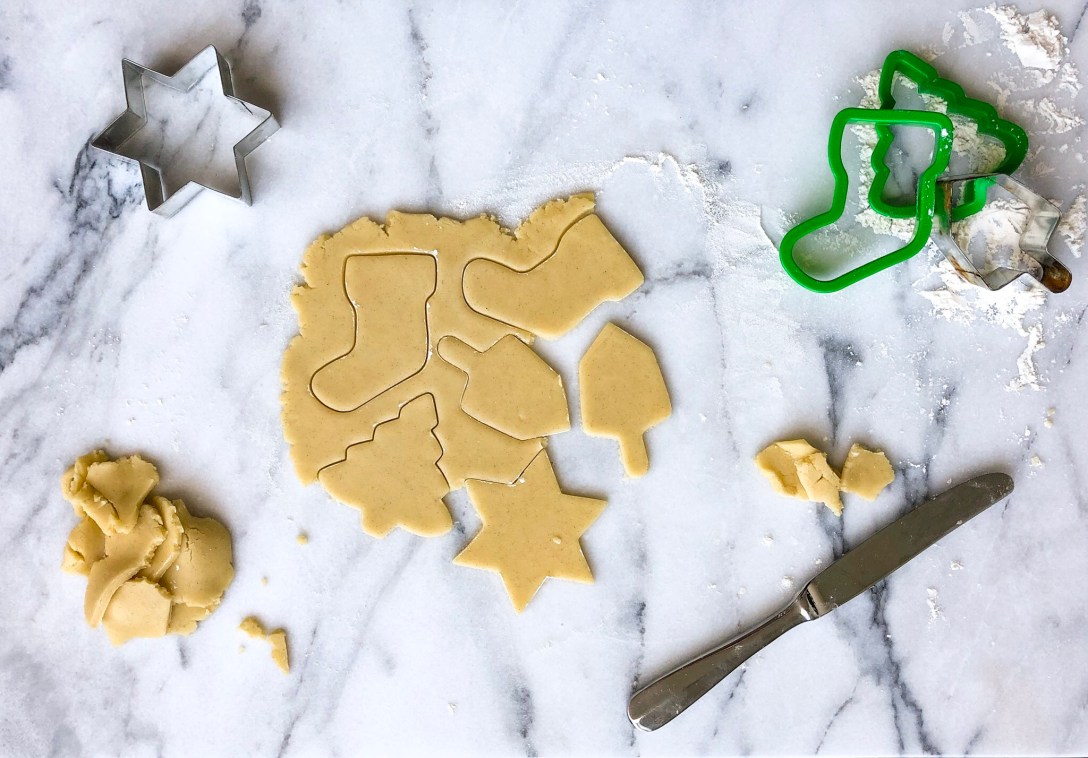
This recipe is easily memorize-able and produces such clean cutouts, especially when cold. There’s not much liquid, so during cutting be cautious about how much flour you add to the surface, especially in recalling and rolling out for a third pass. (A seasoned sugar cookie eater might be able to tell cookies from later rounds.) Despite the name, they can be made all year round and are definitely found in our kitchen during Hanukkah.
Grandma Kitty’s Christmas Cookies
What you need:
- 2 sticks of butter, slightly softened (left out for ~2 hours usually is enough)
- 1 cup sugar
- 1 egg
- 1 tablespoon vanilla bean paste or pure vanilla extract
- 1/2 teaspoon salt
- 3 cups of flour
- 2 teaspoons baking powder
- 2 cups powdered sugar
- 1/2 teaspoon vanilla
- 2-3 tablespoons milk (nut, soy, or lemon juice, water, etc.)
- Sugar and nonperils sprinkles
How to:
- In the bowl of a stand mixer, cream butter and sugar until fully combined and lightly whipped. About 4 minutes depending on the temperature of the butter.
- Add vanilla, egg and salt. Beat until combined.
- With the mixer on medium low speed, add flour, one cup at a time alternating with baking powder teaspoons. (Alternatively, flour and baking powder can be sifted together and then added in three parts.)
- Mix until no flour remains and dough comes together in a mass. It might need a few kneads by hand to get it all together.
- Divide into two or three balls (depending on the size of your workspace) and chill for at least 30 minutes. Dough can be also be frozen at this point. It keeps very well in freezers that don’t Frostbite, as it can dry out; use within a month or two for best results.
- Preheat oven to 350 and line cookie sheets with parchment paper. Roll to 1/8-1/4 inch thick and cut into shapes.
- Bake until tops are dry and the bottom edge is just a touch golden for a cookie with a soft bite. About 4-6 minutes for thin cookies, 6-8 minutes for thicker. Keep a close eye (and nose!) on them as they go from ready to burn very quickly.
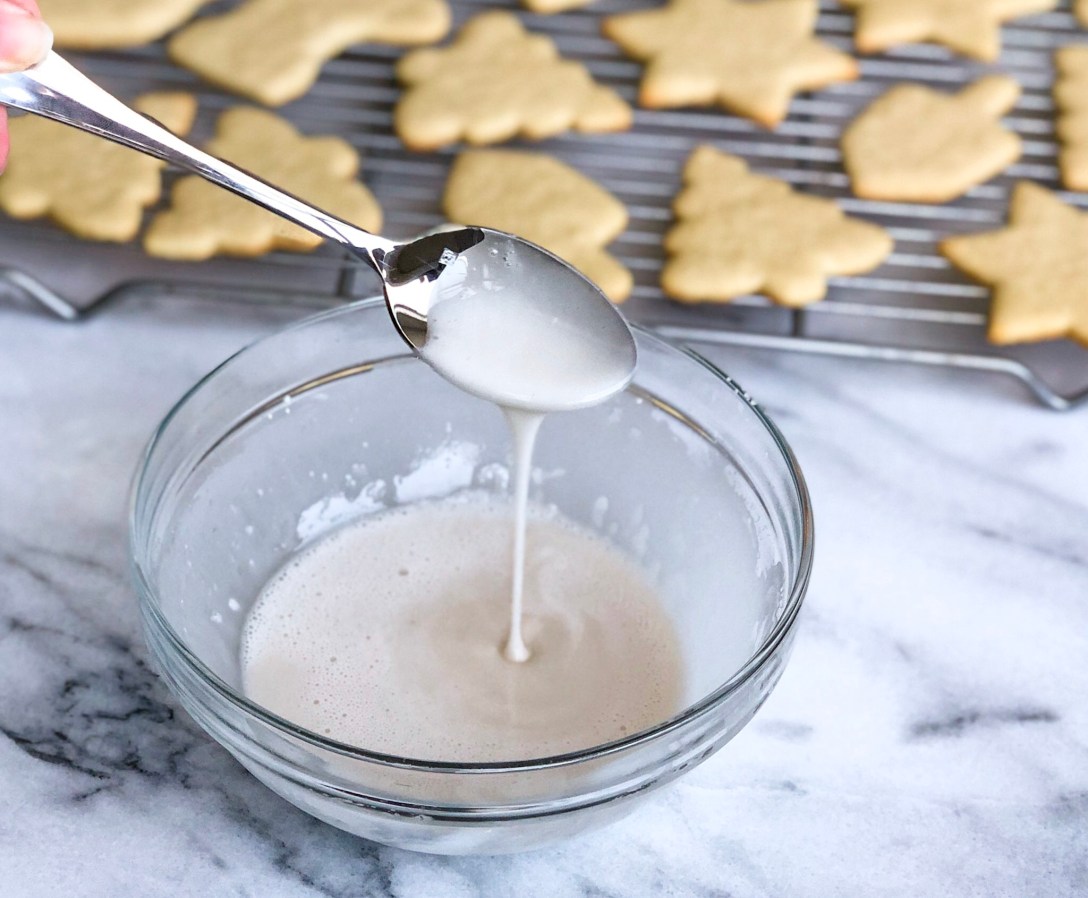
- Keeping cookies on parchment, slide sheets off to cool completely before decorating. (About 30 minutes if removed from hot pan.)
- Sift powdered sugar, whisk in vanilla and milk until smooth. When spoon or whisk is raised and icing is steamed back into bowl, it should create a noticeable dimple/ripple before disappearing. Add more powered sugar or milk to adjust thickness, if it’s too thin, the weight of the sprinkles will push it off the edge of the cookies.
- Use the back of a spoon to spread glaze to within a 1/4 inch of the cookie edge and decorate with sugared sprinkles.
- Allow to dry completely before packing up, about 2 hours. They can be eaten wet, are better dried.